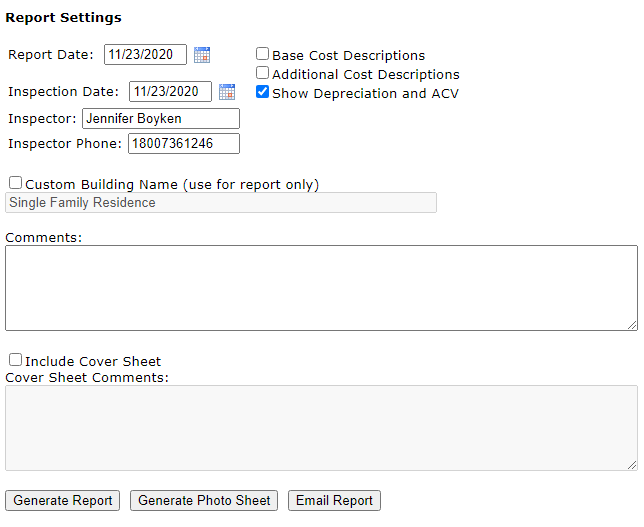
There are three check boxes on this screen which allow you to change the content of your report.
Base Cost Description causes a detailed description of the base cost classifications you selected for this valuation to be printed.
Additional Cost Descriptions provides a more complete breakdown of the additional costs of you building.
Show Depreciation and ACV shows the amount of depreciation applied and the actual cash value of the evaluation.
Inspection Date sets the date the inspection was done.
Inspector allows you to enter the person who inspected the property.
Inspector phone allows you to enter the best phone contact for the inspector.
Building Name will be named whatever building type was selected. If you want to custom name the building check the box next to Custom Building Name then type the new name in the box
Comments box is provided for any additional info or disclaimers that might be needed. Comments will be printed at the bottom of your report.
Cover sheet is provided. Click the box Include Cover Sheet. The Coversheet includes the information from the Address Screen. You can add comments to the Coversheet also.
When you have your options set you are ready to create your report. There are four ways to do this.
Generate Report: The report is rendered on your computer screen for inspection.
Generate Photo Sheet: The photos only is rendered on your computer screen for inspection.
Print Report: To print the report, first click on the Generate Report button. A PDF is created of the report, click the File, Print or the printer symbol on the toolbar.
Email Report: The report is created as a pdf and then attached to a new email with your default email client.